


How to Start a YouTube Channel and Link AdSense in 2025 (Step-by-Step Guide)
 How to Start a YouTube Channel and Link AdSense in 2025 (Step-by-Step Guide)
Estimated reading time: 17 minutes
Thank you for reading this post, don't forget to subscribe!How to Create a YouTube Channel and Link It to AdSense (Step-by-Step Guide for 2025)
Starting a YouTube channel in 2025 opens doors not only to sharing your ideas but also to earning money through AdSense. Linking your channel to AdSense is key because it allows you to get paid for the views and engagement your content generates. This step-by-step guide will walk you through creating a new channel and connecting it to AdSense smoothly, so you can focus on growing your audience and turning your videos into income.
By following clear, simple steps, you’ll be ready to join YouTube’s monetization programs and take advantage of all the ways the platform offers to support creators today. This straightforward process sets you up for success while keeping things manageable for anyone new to YouTube and online earning.
For a practical visual walkthrough, here’s a helpful video that complements this guide: How to Create a YouTube Channel for Beginners in 2025 (Step-by-Step).
Set Up Your Google Account and Verify Identity
Before you create your YouTube channel and connect it to AdSense, the very first step is to set up your Google account properly. This foundation keeps your channel organized and adds security to your online presence. Next, turning on 2-step verification will protect your account and is essential for monetization. Finally, you need to confirm you meet YouTube Partner Program (YPP) eligibility so you can link AdSense and start earning. Here’s how to navigate each part smoothly.
Create or Sign In to a Google Account
To start, you need a Google account to access YouTube’s creator features. You can either use an existing Google account or create a new one dedicated solely to your YouTube channel. Creating a separate account can keep your channel’s data, notifications, and revenue separate from your personal email, which helps keep things organized and secure.
How to create or sign in:
- Visit the Google Account creation page if you need a new one.
- Follow the simple steps by entering your name, choosing a username, and creating a strong password.
- If you already have a Google account, just sign in at accounts.google.com.
- Make sure you remember the login details because this account will manage your channel and any linked services.
Using a dedicated Google account means you can manage your YouTube channel and AdSense more efficiently, avoiding confusion with personal emails or other Google services.
Enable 2‑Step Verification
Google requires 2-step verification (2SV) on the account you use for YouTube monetization. This extra layer of security protects your account from unauthorized access by requiring a second form of confirmation beyond just your password.
Steps to turn on 2-step verification:
- Sign in to your Google account and go to the Google Account Security settings.
- Find the section labeled “2-Step Verification” and click Get Started.
- Follow the prompts to add a phone number where you can receive a text or phone call.
- Once activated, every time you sign in, Google will ask for your password plus a code sent to your phone or generated by an authentication app.
This is not only wise for security, but YouTube also requires 2-step verification to be enabled before you can apply to the YouTube Partner Program and link your AdSense account. If you skip this, monetization won’t be approved.
Check Account Eligibility for YouTube Partner Program
Before you link AdSense to your channel, your account must meet YouTube’s Partner Program eligibility rules. YouTube has clear subscriber, watch-time, and policy standards to maintain a high-quality creator community.
Here are the main requirements as of 2025:
| Requirement | Details |
|---|---|
| Subscribers | At least 1,000 subscribers |
| Watch Hours | 4,000 valid public watch hours over the last 12 months (excluding Shorts and private) |
| Shorts Alternative | Or 10 million valid public Shorts views in the last 90 days |
| Policy Compliance | No active Community Guidelines strikes; follow YouTube’s monetization policies |
| Location | Must live in an eligible country |
| 2-Step Verification | Must be turned on for your Google account |
Only after meeting these requirements can you apply for YPP, which will allow you to link your channel with AdSense to start earning.
Meeting the eligibility criteria shows YouTube that your channel is engaging and compliant. This helps you unlock monetization features like ads, memberships, and more.
For more details on YouTube Partner Program requirements, visit YouTube’s official guide to eligibility.
Following these steps to set up your Google account, enable 2-step verification, and check eligibility will prepare your channel for the next phase: creating your channel itself and linking it to AdSense for monetization. Taking care of this groundwork first helps keep the process smooth and error-free.
Create Your YouTube Channel
Starting a YouTube channel is your first milestone toward sharing your voice and building a space online. It’s where you set the stage for every video, subscriber, and viewer that comes your way. This section breaks down creating your channel in YouTube Studio, customizing it for a strong impression, and preparing your content for early success.
Access YouTube Studio and Start a New Channel
Opening your new YouTube channel is simple when you follow these clear steps inside YouTube Studio:
- Open YouTube and sign in with your Google account.
- Click your avatar (profile picture) in the top right corner. This brings up the account menu.
- Choose Create a channel from the options.
- When asked, select Use a custom name to create a Brand Account. This option lets you pick a name different from your Google account and allows others to manage your channel if needed.
- Enter your preferred channel name and agree to YouTube’s terms.
- Click Create channel. You now have a blank canvas to build on.
Using a Brand Account is ideal for creators who want flexibility with channel management or plan to grow a team. It also helps keep your personal Google identity separate from your channel’s brand.

Photo by greenwish _
Customize Channel Basics
Your channel’s basics are like its front door — it needs to catch attention and clearly communicate what you’re about. Here’s what to focus on:
- Channel Name: Pick a clear, memorable name that reflects your content or brand.
- Description: Write a concise description explaining what viewers will find on your channel. Include keywords that describe your niche to help YouTube and viewers understand your content.
- Profile Picture: Upload a sharp, high-quality image that is recognizable, like a logo or yourself if you’re building a personal brand.
- Banner Image (Channel Art): Use an eye-catching banner that fits YouTube’s recommended size (2560 x 1440 pixels). This appears at the top of your channel page and sets the tone visually.
- Channel Keywords: These are hidden keywords you add in YouTube Studio under Settings > Channel > Basic info. Use relevant keywords that match your content to improve your channel’s discoverability in search.
Clear, consistent branding builds trust and makes your channel look professional. It also helps with Search Engine Optimization (SEO), making it easier for new viewers to find you.
Upload Initial Content and Build Watch Time
With your channel set up, it’s time to add your first videos to start attracting viewers and building watch time. Follow these tips to give your channel a solid start:
- Upload 3 to 5 videos focused on topics that are currently popular and relevant to your niche. Use trends as a way to gain early traction but keep your unique voice.
- Optimize each video’s title, tags, and description using keywords your audience might search for.
- Design custom thumbnails that stand out. Thumbnails are often the first thing potential viewers see, so clear, bright images with readable text work best.
- Focus on creating engaging content to encourage viewers to watch longer, increasing your channel’s overall watch time.
- Keep an eye on your analytics in YouTube Studio to see which videos perform best and make decisions based on real data.
Getting these first videos right is crucial. They set the tone, invite subscribers, and start accumulating the watch time you’ll need to qualify for monetization.
For more on channel creation, you can check YouTube’s official guide to Create a YouTube channel.
This stage is your channel’s launchpad. Once you’ve built this foundation, connecting it to AdSense to earn income becomes much easier.
Apply for the YouTube Partner Program (YPP)
Once your channel hits the eligibility marks and is ready to earn, applying for the YouTube Partner Program is the crucial next step. This process opens up monetization features like ads, memberships, and Super Chats. The application itself is straightforward, but knowing what to expect and how to navigate the steps can save you time and help avoid mistakes.
Navigate to the Earn Tab in YouTube Studio
Start your application by heading to YouTube Studio, your control center for managing your channel. Here’s a quick guide to find the right place to apply:
- Sign in to YouTube Studio.
- In the left menu, click on Monetization. This is where YouTube gathers all the options related to earning and eligibility.
- Under the Earn tab, you’ll see an Apply Now button if your channel meets the minimum requirements.
- Click Apply Now to begin the process.
If the button isn’t there, double-check your subscriber count and watch hours or Shorts views. You can also review your eligibility at any time right from this tab. The interface guides you clearly, so it’s hard to miss.
Review and Accept Terms
Before you can officially join YPP, YouTube asks you to review their Partner Program terms. This is more than a formality; it’s important to understand the rules and expectations.
- Read carefully through the YouTube Partner Program policies and the terms of the agreement.
- These rules cover content guidelines, monetization policies, and your responsibilities as a creator.
- Accepting the terms means you agree to maintain community guidelines and advertiser-friendly content.
- Failure to follow these can lead to demonetization or removal from the program.
Taking time to read these terms helps you avoid surprises later. Think of it as a contract that protects both you and YouTube.
Submit the Application and Wait for Review
After accepting the terms, submit your application. YouTube then reviews your channel to make sure it meets all guidelines and eligibility criteria.
- The review process usually takes about 1 month, but this can vary based on workload.
- During this time, YouTube looks at your channel’s history, content, and compliance with policies.
- Possible outcomes after review:
- Approval: You’ll get access to monetization features and can link your AdSense account.
- Denial: Your channel may fail the review for policy reasons or insufficient compliance.
If denied, don’t worry. You can address the issues that caused the rejection and reapply after 30 days. Use this time to improve your content or fix any problems noted by YouTube.
Tracking your status is easy in YouTube Studio — just return to the Monetization section for updates and next steps.
For full details on eligibility and program benefits, check YouTube’s official Partner Program page.
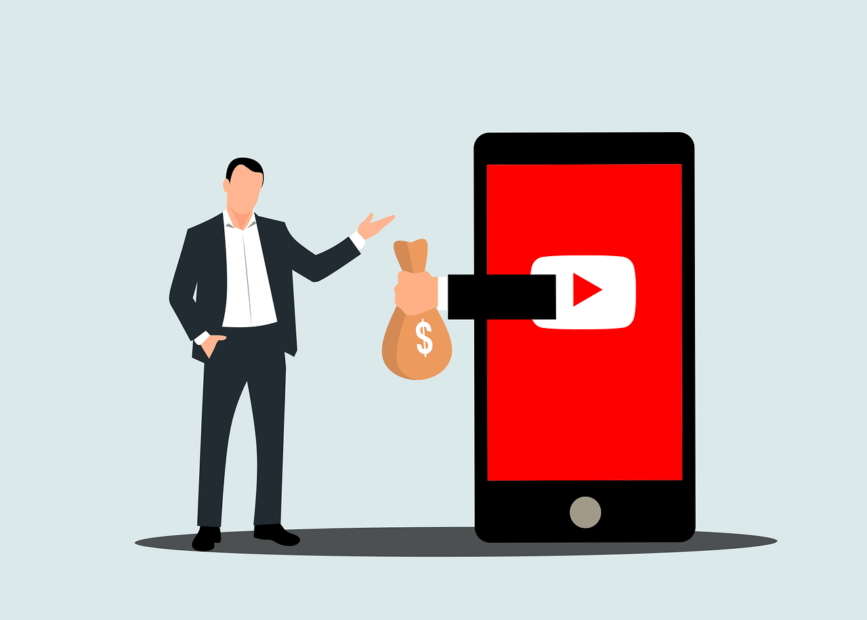
Set Up and Link an AdSense Account
After your YouTube channel meets the YouTube Partner Program requirements and you’ve applied for monetization, the next important step is to set up your AdSense account and link it to your channel. This step unlocks your ability to get paid for the views and engagement your videos generate. Whether you’re creating a new AdSense account or linking an existing one, the process is straightforward if you follow the right steps. Here’s how to get it done efficiently.
Create an AdSense Account via YouTube Studio
If you don’t have an AdSense account yet, YouTube makes it easy to create one right inside YouTube Studio. Here’s what you do:
- Go to YouTube Studio and select the Monetization tab from the main menu.
- In the Earn section, you’ll find the option to Start the AdSense setup. Clicking this begins the application process.
- You will be asked to provide your payment information. This includes your country, name, and address — make sure the details are accurate because this is where your payments will be sent.
- You also need to confirm tax information depending on your location. Google handles this with forms that you fill out online. This step is necessary to comply with tax laws.
- Once completed, your AdSense account will get linked automatically to your YouTube channel. You’ll receive email notifications about your account status.
This built-in path through YouTube Studio simplifies creating an account and saves you from navigating Google AdSense separately. It keeps everything linked easily without extra trouble. For detailed instructions, Google offers a helpful guide on setting up AdSense for YouTube.
Link Existing AdSense Account (if you have one)
If you already have an AdSense account from another Google service, you can link it instead of creating a new one. Just make sure:
- The AdSense account uses the same Google account linked to your YouTube channel. Different Google accounts cannot be connected for monetization.
- In YouTube Studio, go to Monetization > Earn, then choose Use an existing AdSense account.
- Sign in to your existing AdSense when prompted and confirm the connection.
Linking your current AdSense means you don’t have to set up payment info again or fill in tax details, as these should already be configured. This saves time and centralizes your revenue tracking if you’re managing multiple websites or channels. However, if you want to separate income streams, creating a new account might be better.
Verify Account and Set Payment Threshold
After your AdSense account is linked, there are a few final steps before you start receiving payments. First, YouTube and Google will ask you to:
- Verify your email address. Look for a confirmation email from AdSense and click the verification link inside.
- Set your payment threshold, which by default is $100. This means your earnings must reach at least $100 before Google issues a payment.
- Add a payout method. You can choose from different payment options such as direct bank transfer, check, or other regional methods. This setup happens in AdSense under Payments > Payment settings.
You can check and adjust these settings anytime in your AdSense account. It’s important to update payout details if they change to avoid delays.
Once verified and payment info is saved, you’re all set. Earnings will accumulate, and Google will pay you promptly when your balance hits the threshold.
By completing these steps, you ensure that your channel’s monetization earnings flow into your bank account smoothly and securely. This setup is crucial for turning your content into income without unnecessary delays or complications.
For more on managing payments and thresholds, Google’s official AdSense payment guide offers clear advice.
This process may seem like a few extra steps, but it’s the key to unlocking your YouTube earnings. Creating or linking AdSense properly ensures you get paid for your hard work and opens up more ways to monetize your channel as it grows.
Optimize Your Channel for Ongoing Monetization
Getting your YouTube channel connected to AdSense is just the start. To actually grow your earnings over time, you need to make sure your channel is set up to take full advantage of all the monetization options YouTube offers in 2025. This means enabling every relevant feature, staying on the right side of YouTube’s rules, and using analytics actively to make smarter content decisions. Let’s break down how you can do this step-by-step.
Enable All Monetization Features
Monetization on YouTube today goes beyond just placing ads on your videos. To maximize your revenue streams, you should turn on all the available features that fit your channel’s style and audience. Here are the key options to enable as soon as you qualify for the YouTube Partner Program:
- Ads on Videos: This includes skippable, non-skippable, and display ads that run during your standard videos. Turning ads on is the foundation of YouTube revenue.
- Shorts Ads: YouTube Shorts can now earn ad revenue similarly to regular videos, as long as you’re in the Partner Program. Make sure this is activated to catch the rising wave of Shorts views.
- Channel Memberships: Offer paid memberships to your fans with perks like exclusive badges, emojis, and members-only content. This creates a steady income source beyond ads.
- Super Chat and Super Stickers: If you do live streams, enabling Super Chat lets your viewers pay to highlight their messages, making live engagement both fun and profitable.
- Merchandise Shelves: If you have merchandise or branded products, use YouTube’s merchandise shelf to showcase them directly below your videos for easy shopping.
To enable these, go to YouTube Studio > Monetization, then click the “Features” tab. From there, turn on each feature that applies, and set up any additional information needed (like membership perks or merch partners).
These options diversify your income and keep your channel monetized even when ad rates fluctuate or particular videos don’t perform as well. YouTube has more details on each feature in their monetization guide.
Follow Community Guidelines and Copyright Rules
Monetization depends heavily on keeping your channel in good standing with YouTube’s policies. Avoiding strikes and Content ID issues protects your ongoing revenue and channel health:
- Avoid Strikes: Community Guidelines strikes can block monetization and, in severe cases, terminate channels. Stick to rules about violent content, hate speech, misinformation, and spam.
- Use Royalty-Free or Licensed Assets: Always use music, images, and video clips you have rights to. Royalty-free libraries or creating your own assets are safest. Using copyrighted materials without permission can trigger Content ID claims that either demonetize videos or block them.
- Monitor Content ID Claims: Check your YouTube Studio dashboard regularly for any copyright claims. You can dispute false claims or remove the infringing content. Addressing these quickly keeps your earnings uninterrupted.
By maintaining compliance, you ensure your channel remains eligible for all monetization features with no sudden revenue loss. YouTube’s official monetization policies offer clear guidance on what’s allowed.
Use Analytics to Grow Revenue
Your YouTube Analytics is more than just numbers — it’s a map to growing your revenue through smarter content choices. Here are three key metrics to watch and what to do with them:
- RPM (Revenue Per Mille): RPM shows how much you earn per 1,000 views after YouTube’s cut. If RPM drops, you may want to tweak topics or target higher-CPM niches like finance, education, or tech. Understanding your channel’s RPM trends helps spot what content drives income.
- CTR (Click-Through Rate): CTR measures how often people click your videos after seeing thumbnails and titles. Aim for 4% to 10%. If CTR is low, test different titles and custom thumbnails that better attract viewers. A good CTR brings more views, which lifts earnings.
- Audience Retention: This tells you how much of your video people watch on average. Low retention means viewers drop before ads play, reducing your income. To improve retention, make your content engaging from start to finish, edit tightly, and keep your video pace lively.
Check these stats weekly in YouTube Studio’s Analytics section. Then, adjust your upload strategy, content style, or video topics based on what the data shows. This regular tuning turns your channel into a revenue-generating machine.
For deeper tips on analyzing and using YouTube data to boost earnings, this guide to YouTube Analytics is a solid resource.
Building a channel for ongoing monetization means more than just joining the Partner Program and linking AdSense. By fully enabling monetization features, staying compliant with YouTube’s rules, and using analytics to refine your content, you set yourself up for steady growth and income. These practices help your channel profit from every opportunity YouTube offers today.
Conclusion
Creating a YouTube channel and linking it to AdSense in 2025 is a straightforward process when you follow the right steps. Setting up a Google account with 2-step verification, meeting YouTube Partner Program requirements, and submitting your application are essential first moves. Once accepted, connecting or creating your AdSense account unlocks your channel’s ability to earn revenue from ads and other monetization options.
Take the time to build your channel carefully, comply with YouTube’s policies, and use analytics to guide your content choices. Starting now means you can grow your audience and income steadily.
Ready to launch your channel? Get started today, and feel free to share your progress or questions in the comments. Your journey to earning on YouTube begins with that first step.